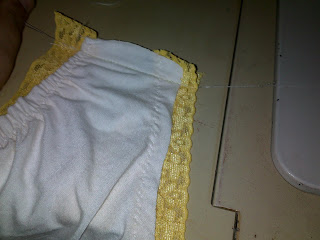
now i have about two months left for my due date well less than two anyway.
Now i'm seriously getting my baby clothes project going. I think if don't my baby wont have any cool stuff when he comes. And by cool i mean stuff that's airy and comfortable. Not rock star hip hop cool
Anyway i got this really Soft and comfortable baby cotton from naares (that's the name of the shop here in male' btw male' is full of fabric stores since half the ladies in this place know how to stitch and every house probably has a sewing machine but this is the only place i can find cute baby cottons with cute prints. I don't want my baby to end up in plain color clothes. And i also found very soft cotton bias binding from the same place and some adorable little buttons which i would use later but just couldn't resist buying)
Anyway i don't know how to make a pdf file and i don't have the software. I know you would say well get the software. Well i would if i had any idea how to use it.
Anyhow ill try to tell u step by step how i created the pattern
You can have a look at the picture below
Since its for a new born baby you can use an A4 sheet make the pattern i know once u draw it its going to look huge but remember the babys nappy has to fit in it and i have left space at the top to make a fold for the elastic to go through and there is a half inch seam allowance on the sides
And also there is an extra one inch at the bottom for hemming
making the pattern
If u can get from the picture what i have done you dont need to read below. Just go ahead and draw pattern
Draw a 9 inch line on one side of the A4 sheet this is ur folding edge
Draw a horizontal line which measures 5 inch from the top of this line towards the oppsite edge of the paper
Now draw a 4 and 1/2 inch line from the bottom of the nine inch line towards the opposite edge
 Now measure 6 inch from the top of the 9 inch line mark this point (the blue line)
Draw a horizontal line measuring 6 inch from the point(the perforated line as shown)
You should now have one vertical line and 3 horizontal lines
Draw one line from the end of the top line to meet the 6 inch line(orange line)
Now draw another line from the end of the 4 and half inch line to meet the 6inch line(green line)
Now u have a top and a bottom part of the pattern top being above the 6 inch line and bottom being below the 6 inch line
Now at the top part draw a curve from the middle of the vertical line to meet the end of the 6inch line
At the bottom draw a curve from the end of the 4 and half inch line to the end of the 6 inch line
your pattern is done now
You can cut it along the outer lines
Things you need
Pre-washed and ironed fabric
matching thread
sewing machine
Scissors
the pattern
Nine inch piece of thin elastic
Cutting
Fold the cloth in half
Align the folding edge and cut two piece
you are done with cutting
Sewing
I like to do the hemming first my machine is very old (my mother got it before i was born and im 28 now ) and it doesn't have free arm sewing if it did i think this would be the last thing i do
So for hemming the bottom i fold about 1cm twice press it down with a hot iron and stitch along the edge
Do for both pieces
Put the two pieces with right sides together
Now stitch the top part on both sides
Zigzag or serge to prevent fraying. I don't have a serger so zigzag it is.
Now open the shorts so that it looks like one, keep it right sides together still
Now do the crotch seam and zigzag
Now fold down the top twice (first fold about half a cm next fold about half an inch) and press down i can do this with out using an iron but if u feel u cant its better to fold and iron and then stitch close to the edge
Leave an opening for elastic
attach elastic to a safety pin and run through the top
Stitch ends together
your shorts are done
heres what i made
this next one is the first one i made i think the legs r too long what i have shared with you is the second one i made with more room for the nappy
i also made one from material left over after making my onesie. if you look at my onesie post you will see the matching one.http://laucreates.blogspot.com/2011/07/baby-onsie.html
sorry i coudnt provide step by step stitching instructions. i plan to make more shorts so ill try and do that next time if anyone wants it.


