Tuesday, October 29, 2013

DIY CLUTCH PURSE


FANCY CLUTCH PURSE

so the parties i'mgoing to im on huge diy spree as opposed to a shopping spree
for the cluthes i have browsed all ove but i cat find the idea im looking for
but i did get a lot of ideas
the problem which i thought would be most is that i would needto make it stiff
i was thinking about cutting vinyl files but they would b hard but i saw this blog where she used a table mat and i think that is even better because it will be softer and thicker but a lot seems to be done from interfacing
and i thought i would give interfacing a try
after that if i'm no happy i could do the mat thing again
i just didn't want to go and buy a pack of 6 place mats as i would be using only one or two it seemed like a waste
so i decided to give interfacing a try
here is my first one
this is the first one i made i might or might not end up taking it to the party' ut that will totally depend on what i come up with next

here i how i made it
u need 2 rectangular pieces with interfacing ironed on
i started with two piece that were the same size
then cut all around leave a one inch border around
select one piece to be he outside this for me was the one which looked smoothest
i folded the sides in and pasted inside
let this dry overnight

i use bobby pins and lines pin to old the sides down while they dry. i don't use a glue for this purpose i use fabric glue but i guess you can use a glue gun as well
now take the ther piece and cut about half inch all around
attach the sides together
let theses dry, overnight if you use a glue gun u can use it at the same time

let this dry under a flat surface i dried it under a book
doing the sides i have
this is how the sides looked in the end when i started outi put flaps on the sides but i didntneed them in the end and i ended cutting them off
what you do is just cut a pattern like this from interfacing and iron on material and cut along the line  semi circle. then overlap the two sides and stick them together.


now after a day i started assembling the purse

assembling is pretty easy
u just fold the purse as you like i folded inthree
then the sides were stuck inside
that's it
purse is done
now comes the decoration the fancy part

making the big flower
you need a long strip of cloth


 cut one end in waves
and use a candle to burn the ends some people are very proficient in this but don't have enough confidence to take photos so i'm sorry about that

 use a needle to do a running stitch along the other end this is for gathering
using the thread roughly assemble the flower
cut a round piece of interfacing
and stick the flower to this
stick some large beads in the center

 now for the petals on the side
here is how i did it, there are lots of tutorials on the internet and youtube too but this is one i just found
http://www.cuteasafox.com/2010/07/hand-sewn-fabric-flowers.html

i made about eight and selected the best looking
then i usedthe glue gun to stick them on the top o the purse with a bead here and there and two brooches


and then its done


i used two velcro squares for fastening i stuck them with the glue gun
and here is my clutch

Tuesday, October 22, 2013

DRAFTING A PATTERN FOR A GOWN

MAKING BASIC PATTERN FOR AN EVENING GOWN
this is a continuation of previous post
the peach dress
having more than a month till the weddings that I'm going to attend i have decided that i would go slow and take time with my stitching
i always make my patterns or just go straight to cutting using some of my clothes as pattern
here also i'm using one one of my old shirts for pattern
it also helps that u use the exact same kind of material when ever possible
for examlpe if the material you got for ur gown is a stretchy one then you should of course use a stretchy material or a t shirt or something which you have which is very similar
for if u make a pattern from as stretchy material n dress from a non stretchy one then you will have a too tight fit or very unbecoming fit for the dress.
now i have material which is not at all stretchy some cotton crepe and chiffon

take your old top or shirt wrong side out' folded and lay it along the side of the newspaper

fold the sleeve in if present sleeveless top would be a better choice if u want a sleeveless gown

measure from the shoulder to ur under bust for me this is 14 inches

draw an outline i have used a marker u can use  pencil

you can draw how deep ur neck will be on tis and make a double and cut if u like i'm just going to use this

if you want to add a wider seam allowance thi would b the time i just want the goown to be looser at the under bust

measure the width of the waist band i want it to be 3 inches so with a half inch allowance on both sides im making it 4 inches

it would help if you drew the waist band below the top pattern it would have the advantage u have to make less measurements

keep two new papers or any paper you are using below the waist band i forgot to take a pic then this is was taken after i drew the skirt

now take a measurement from the length of the top part plus band from there to the floor this was 38 inches for me alternatively u can take a hollow to floor measurement n subtract the other two . u can allow for a seam allowance a blot half an inch. this u measure from the top of skirt potion

draw a curve at the base for how ever wide you would like your skirt and from the top join this down it may take a few tries to get a good shape


your pattern pieces look something like this

I know this doesn't look clear so here is a pdf
dress pattern

Monday, October 21, 2013

DECIDING A WEDDING GUEST DRESS

GETTING READY FOR WEDDINGS
i know it has been a few days since i last wrote. but i have been very busy. i have been shopping. tht is my version of shopping which is mostly browsing online and saving pictures of everything i like.
there is gonna be three weddings i my family in next december. and they all hav specific color themes
they are peach, green and royal blue.
I'm residing in India now . but being originally from Maldives i would be going home for the holidays. gowns are expensive and i wont be able to afford gowns for all three weddings not to mention m husband would b completely broke if i did that much shopping.
so i decided to go ahead and do the stuff myself
i am going ahead with making the peach colored gown first

these are going to be my inspiration the top part of the gown would be as in the first picture and the skirt would be like in the second picture.
this 2nd dress costs around 200 dollars online.shopping here i have got the fabric for about twenty dollars.
so im saving big time plus  willl hav sleeves with the dress.
i wear hijab so sleeves if a must for me. i know some people wear long sleeves inside the dress or they wear a waist coat. but that is not the same as the same as having a dress with sleeves and thats one reason i prefer making my own.
i donno how close im going to get to making the dress like in the pictures 
but i do hope i come pretty close
buying fabric and starting over would been option buy seriously the time would have been an annoyance.
i'm going to start with a pattern which i can hopefully use for all three dresses with little alteration
i'm hoping the next post i do be about pattern making for a ball gown. i'm plus sized so i always like to go with empire waist gowns.
i'm also planning to do the accessories for the dresses myself as well
like the shoes and clutches etc
hope it looks at the end
i'm planning to draft the pattern tonight so maybe in a few days ill post the tutorial lets say two or three days i plan to use a well fitting cotton shirt and a measuring tape to draft the pattern.
here's hoping all goes well


Tuesday, October 8, 2013

sewing the pillow cover


Making a pillow cover
Three pieces of cloth needed


And one long piece for frills
 
Making frills
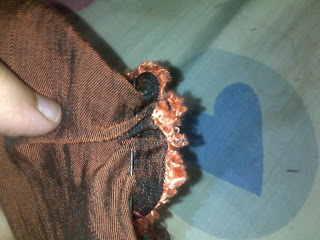
Hem one side u can zigzag or i choose to fold in and stitch
I'm showing step by step how i folded twice and stitched.

 
Then put ribbon trimming on all the hemmed side
Now put a gathering stitch on it
Pull it to make frills
If u want u can do deco on the rectangular piece i have shown how i did


Attach frills to rectangular piece facing in right sides together
 
Fold in and stitch one side of both small pieces. this is the open edge which u will put towards the middle.
 
Lay them on top of the bigger piece pin and stitch
 
Turn inside out
i don't have all the pictures for all the steps so i hope this pdf helps
pillow